Pebble Beach - GR; 2,200 gallon Rainwater Harvesting System
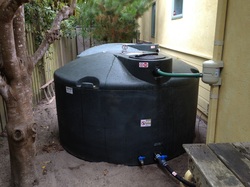
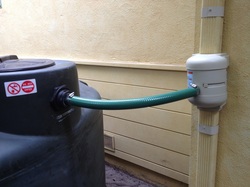
This is the finished system. Leaf Solution gutter filters are the primary filter and are made of stainless steel mesh and are fitted to the tops of the gutters to divert debris from the gutters and downspouts. A secondary GRAF downspout diverter and coarse filter is placed in the middle of the downspout. It diverts water into the tanks after primary filtration. It also acts as an overflow when the tanks are full, and can be used as a first flush by sliding a button on the side to close off water being diverted to the tanks. At the bottom of the tank are several ball valves. One is for gravity flow with a garden hose and the other is the input to the pump system.
The space available
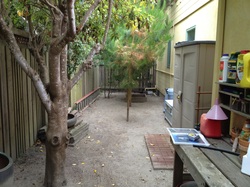
This is the "before" picture. It shows the initial space available. GSL recommended tanks that would fit in the space and meet the setback requirements from the county.
A Dry Run
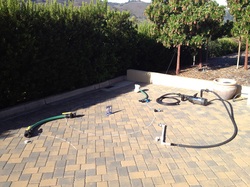
Before every installation and the delivery of the tanks to the site, GSL does a dry run with chalk lines representing the tanks. We lay out all the components to make sure our design is solid and we have all the parts. Once we've satisfied ourselves, we know we are ready to deliver the tanks and install the system.
A Clean System
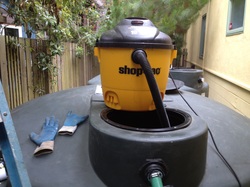
In the process of installing a system we have to cut holes in the tanks to install fittings. This leaves a lot of plastic sawdust in the tanks. It is very important to vacuum this up so it doesn't get sucked into the pump system and potentially cause damage. Not everyone can fit into a tank!
Closer look at the GRAF Quattro Downspout Diverter
This shows specifically where the GRAF diverter sits in the downspout and how it is connected to the tank. It also shows the slide on the side of the diverter to open or close the flow of water to the tank. When the tanks fill, any additional water will overflow inside the diverter and down the downspout. If the slide is put into the closed position all water will be diverted down the downspout. This is a good idea at the beginning of the rainy season to let the initial rains wash the roof off before diverting water into the tanks. It is also a good idea to do this if you are in an area with heavy pollen releases. Diverting at these times will help keep the water as clean as possible in the tanks.
Flexible Connections
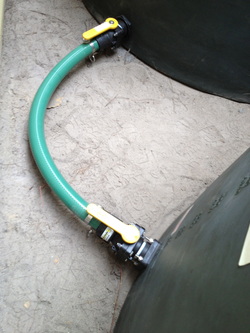
This shows the flexible connections between tanks and the ability to isolate each tank. Flexibility is a must in case of settling or earthquake. Rigid pipes are more likely to break if settling or earthquake occurs and if that happens you will likely lose the water stored in the tanks. Tank manufacturers also call for flexible connections to avoid damage to tanks. Since we were restricted on the size of the tanks we could install in the side yard, the connection between two smaller tanks allows it to function as one large tank. There isn't a restriction on how many smaller tanks you can daisy chain together.
Distribution Outlets
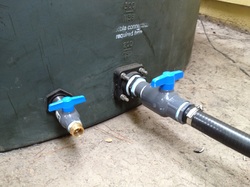
A gravity flow valve is shown on the left with a hose adapter. The right side valve shows a suction hose that leads to the pump.
1 HP Pump
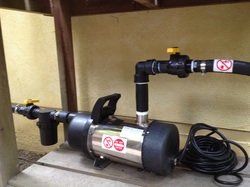
This is a 1 HP pump that provides about 60 PSI. It has a filter on the incoming side and pressure hose on the outlet to the irrigation system. On both sides a ball valve and union are installed to allow for easy maintenance. The pump is made of stainless steel and is completely water resistant. The pump has automated sensors to detect a drop in pressure when the irrigation system or hose bib is being used. It cycles on while there is a need for water and then goes off when the need stops.
Water Level Indicator
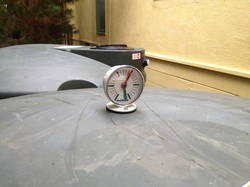
The picture shows a water level indicator. When the needle is on red the tanks are empty. As the tanks fill the needle will move toward the green line. This is an easy way to know how much water is in your system.
Hose Outlet
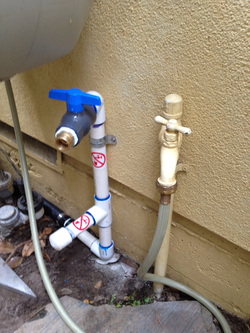
The ball valve and hose adapter on the left allow for the customer to use their stored rainwater under pressure from the pump. In this case we also left a stub for a future connection to the irrigation system. When the tanks have rainwater in them the customer can use the rainwater and stop using the municipal water by unscrewing the hose from the yellow hose bib and screwing it onto the hose adapter/ball valve on the left.
